


After I described in my previous post how I built the turntable for the automated image recording, it is now about the control of the stepper motor and the camera. Since a small Raspberry Pi 3 B+ and the programming language Python is ideal for this, the implementation was quite simple. The most important question for me was how fast should the stepper motor start and how many degrees should the plate turn until a picture is taken again. But I will explain all this in the following and show how everything can be configured so that the image recording is easy.
Now it’s time to set up the Raspberry Pi and install the necessary packages. So that I as a user can also align and focus the image, the camera image is streamed live over the network from the Raspberry Pi. This way I can use any browser to check the image before starting the automated capture process. Unfortunately, I have not yet designed a web interface to start the capture of the image series. But this optimization will be implemented by me at a later time.
Set up Raspberry Pi and set up live video stream
I recommend using a 32GB mirco SD card which should be as fast as possible in terms of write speed. Because this way the whole process can be accelerated if the images with their approx. 4MB per image can be written fast to the SD card.
As image I chose a somewhat old image, because most libraries are supported and I can use my since years used Python library to access the camera. So for now the image will be downloaded.
Download image: 2021-05-07-raspios-buster-armhf.zip
Now the image must be written to the micro SD card. Afterwards please reboot the Raspberry Pi and do the basic configuration according to the menu on the screen. It is important that the access via SSH is allowed. This way you can later download the images from the Raspberry Pi e.g. with a program like WIN-SCP from Windows. The SSH connection is activated in the terminal window directly on the Raspberry Pi as shown in the following screenshot. With the following command the configuration menu is started.
Command: sudo raspi-config
Then change to the 3rd entry of the menu with the name “Interface Options”. Then select the entry for SSH. In the Terminal Fesnter you should see now the following and please activate here the item SSH.
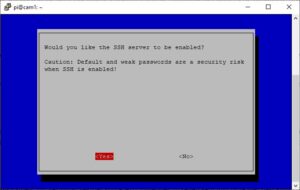
activate ssh connection
After all this is done, please download and run the following script. This script install_cam.sh installs all other components that are needed for the live stream like the mjpg-streamer.
Download Script: install_cam.zip
After the script has been successfully executed and all the software has been installed, the live video is now available via the following URL.
Live video stream: <IP-address of your Raspberry Pi>:8080
Important is the live video stream so that the camera is always adjusted to the object. Because it is possible to adjust the focus and the exposure depending on the lens used.
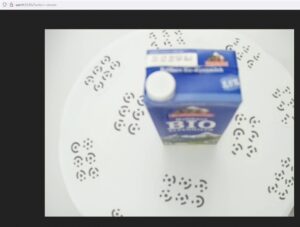 photogrammetry automatic turntable for precise picture recording mjpg-streamer sharpness |
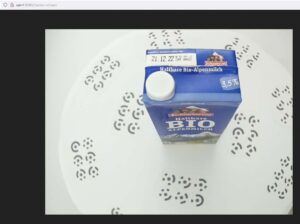 photogrammetry automatic turntable for precise picture recording mjpg-streamer sharpness good |
Set up Python program for image capture
The Python program that rotates the turntable and then takes a picture is quite simple. Here goes a big thank you to Bert Kößler and his website https://www.heimkino-praxis.de/leinwand-maskierung-schrittmotor-steuerung/ for the great example program that I have used here to rotate my turntable. That means now just download the Python program for controlling the recording process.
Download: photogrammetry recorder python program.zip
Please place the program on the Raspberry Pi e.g. in the home directory of the user pi and here in a subfolder scripte. For example in the following path /home/pi/scripte. Then create a folder workspace where the images are stored. The path for the images is composed of the name of the object that is on the turntable. To do this, the object name must be entered manually in the small Python program. This is not optimal and should be more comfortable to enter later in the web interface. The name is important to keep the image series apart. Because sometimes you will take an object from above and then also from below to get a complete view. This should be reflected in the name of the images or the folder for the images.
Here is the place in the program code where the name of the object on the turntable is stored.
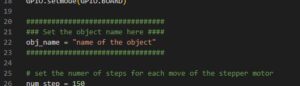
photogrammetry set object name
Now simply start the Python program with the following command via the console. It is important to change to the correct folder in the console where the Python program is stored.
Command: python photogrammetry_recorder.py
The recording should start, the turntable should rotate and the camera should record images. In the folder workspace and here in the selected subfolder should now be the images that we will read in a further step in the photogrammetry software.

Summary
If the live stream of the camera works and the turntable rotates, then the recording of the images should also work. Thus, with little effort, one has built a great automated solution with which now many images of an object can be captured without much effort. For a good reconstruction of an object in a photogrammetry software one needs once many well illuminated pictures from different angles on the object. The illumination is also another thing and there I will go into it in another post. With this project I have learned a lot and had a lot of fun to develop the setup so far that it is really a help for image recording.
[Photogrammmetrie-EN]


Recent Comments